When a flange, access panel, or equipment housing starts to seep, a small gap can lead to lost product, unplanned downtime, or a safety concern. Maintenance teams searching online for Interface gaskets are often looking for a dependable way to seal two connected surfaces. Choosing and installing the right gasket helps create a barrier that keeps liquids, gases, dust, and other contaminants where they belong.
How a gasket creates a seal
A gasket sits between two mating surfaces and fills minor imperfections that would otherwise leave paths for leakage. When fasteners apply pressure, the material compresses and conforms to the surfaces. This compression creates a seal around the joint, helping the connection withstand operating conditions.
The gasket does not work alone. Its performance depends on the condition of the flanges or panels, the evenness of the clamping force, and the demands of the system. A damaged surface, uneven bolt tightening, or incorrect gasket thickness can undermine an otherwise suitable material.
Match the material to the application
Before selecting a gasket, identify what it must seal and the conditions it will encounter. Consider the fluid or gas, operating temperature, pressure, exposure to chemicals, and expected movement or vibration. A material that performs well in a dry enclosure may not be suitable for contact with hot oil or a cleaning chemical.
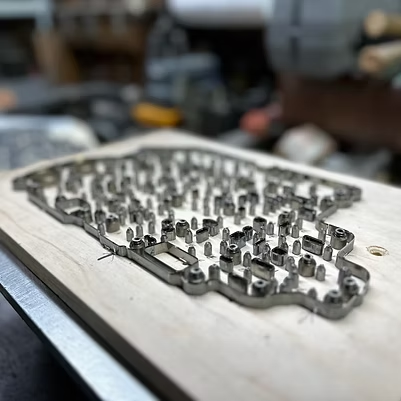
Also consider the joint itself. The gasket’s shape and dimensions should match the sealing area, including openings for bolts, ports, and internal passages. In many industrial settings, die-cut parts can be made to fit specific joint designs. Accurate dimensions help prevent gaps and avoid obstructing flow paths.
When requirements are uncertain, consult equipment documentation and material compatibility information. For critical or regulated applications, involve a qualified engineer or supplier rather than relying on a general-purpose material.
Installation matters as much as selection
Even a well-matched gasket can leak if it is installed incorrectly. Before assembly, shut down and isolate equipment according to site procedures. Remove the old gasket carefully, then clean the mating surfaces and inspect them for corrosion, scoring, warping, or debris. Surface damage may require repair before a new seal can work reliably.
Position the gasket without stretching, folding, or shifting it. Tighten fasteners gradually in the sequence recommended for the equipment, typically using a cross-pattern on flanged joints. This helps distribute pressure more evenly. Use the specified torque when available; excessive tightening can crush or damage a gasket, while too little pressure may leave leak paths.
Inspect and replace proactively
After installation, check the joint for signs of leakage during startup and routine operation, following the system’s safety procedures. Look for moisture, residue, pressure loss, odor, or unusual changes in performance. If leakage returns, investigate the cause instead of simply tightening the fasteners: the material, surface condition, installation method, or operating conditions may be unsuitable.
During scheduled maintenance, replace gaskets that are cracked, hardened, swollen, or permanently compressed. Keep records of materials used, service conditions, and recurring failures. These details can help maintenance teams spot patterns and make better choices during future repairs.
A reliable seal depends on the right material, accurate fit, sound mating surfaces, and careful installation. By evaluating operating conditions, following assembly requirements, and inspecting joints regularly, US industrial facilities can reduce leak risks, protect equipment, and support safer, more consistent operations.